Mastering the Night Sky: How to Capture Aurora on iPhone
Such a phenomenal global natural wonder as the aurora borealis or the Northern Lights is a dream of many photographers and travelers to catch and photograph. Since the improvement of the technology in the smartphone especially in iPhone, you can capture this natural event with great optical resolution.
In this guide, you will learn How to Capture Aurora on iPhone, the basics about these fascinating natural phenomena to the technical details of photographing them.
Understanding Auroras
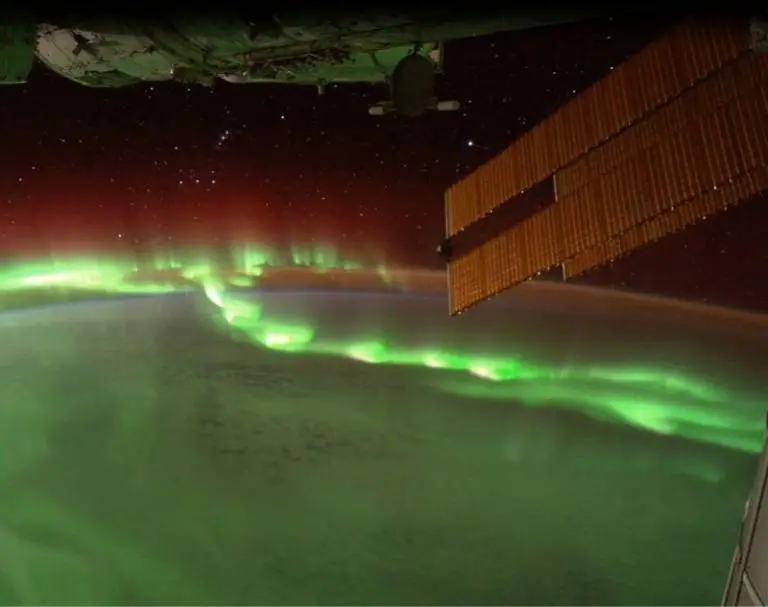
Now that we have the fundamental principles out of the way let us understand what auroras are and why they exist. Auroras are light phenomena mainly reported at the Earth’s polar circles or polar regions of the Arctic and Antarctic.
They are a result of charged particles in the sun fetching the magnetic field and the atmosphere of the earth. These ionised particles interact with gases in the atmosphere when they come into contact generating bright colours of greens, reds, purples and blues.
The best time to see auroras is at night in the winter because nights are longer and therefore skies are black. Areas strictly inside the auroral oval, for example, northern Norway, Alaska, Canada or parts of Iceland, offer the best images. Obviously, for those who can catch this event on camera, the location without significant artificial illumination is essential since the glamorous metropolitan lighting may cause serious lost of exposure.
Optimal Locations for Aurora Photography
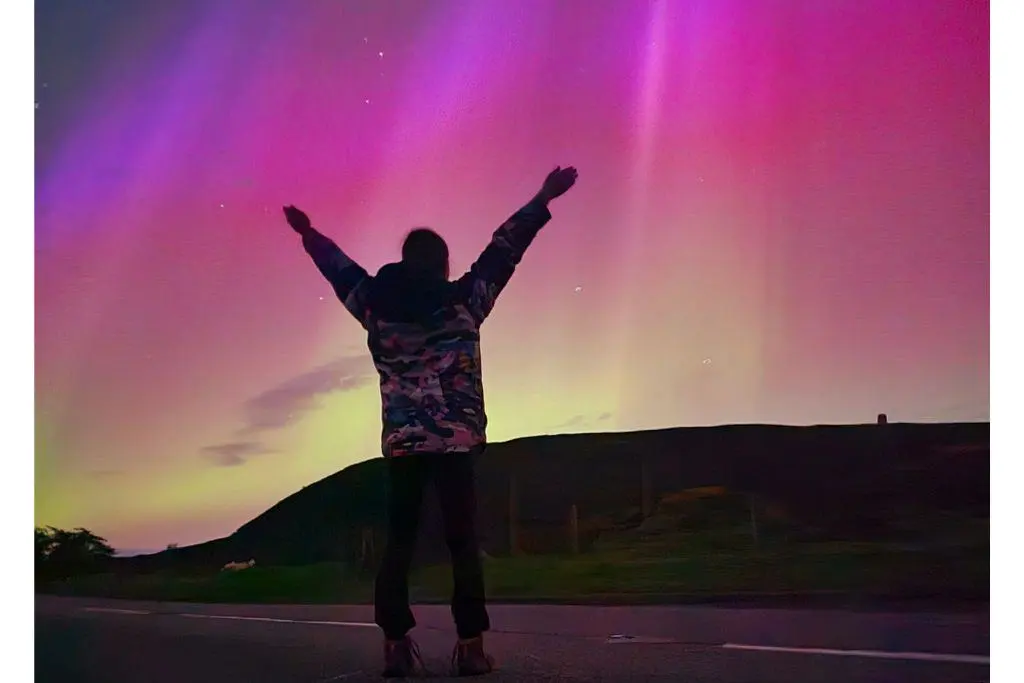
The thing to note when scouting for the location of your aurora photography adventure is that location is paramount when shooting auroras. For higher chances of seeing and photographing the Northern Lights, try to go to those places that are far from city lights. Places such as national parks and wilderness usually host clear skies especially at night and thought good spots. Search for local aurora and choose nights when it is believed that there will be high levels of solar activity.
Also, it is good to conduct a security reconnaissance of your area at day time or at least early mornings. Look for objects in the nature that will add values to your picture such as hills, waters or specific trees. These elements can make your photographs much richer and capture client’s attention, which makes them interesting photos, which speak about the experience under the stars.
Weather Conditions
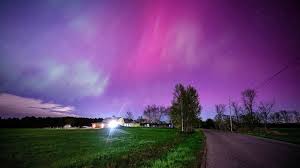
Aurora activity is affected by the weather and therefore clear skies are most likely to give the best results. To see auroras one needs to have a cloudless night because clouds interfere with the lights of the auroras. It is advisable also to look at cloud coverage and temperature before proceeding with the outdoor trip. This could probably be true since most cold nights are preceded by clear nights, but however the chill is always felt. Be sure that you avoid cold and bring along with you some blanket if you don’t have portable heater available.
I also like to check the condition in local area for aurora activity. There are special applications and web-sites regarding the forecasts of the aurora that can notify you when the activity of the sun is at its highest, thus providing you with the best chances for getting the lights while in action.
Features of iPhones Camera for Night Photography
Several iPhone camera options are geared toward low light environment, which makes the iPhone an ideal gadget for shooting the Northern Lights. Getting to know some of the iPhone camera features is important. Present model like the iPhone 13 and iPhone 14 have enhanced night mode functionalities embedded that measures parameters such as exposure time and ISO for better low light photography.
If possible, then switch the settings to manual ones for the best outcomes. This helps you to determine the shutter speed, the use of ISO and exposure that is very important whenever you are taking pictures of moving lights in the night sky. Faster shutter speed, usually ranging from 5 to 30 seconds is better for the aurora since greater amount of light falls on the sensor in this circumstance.
iso should be adjusted equally; the higher iso provides much better sensitivity to light but come with the cost of noise. These settings, taken in moderation, will be most effective if struck in the right ratio. Furthermore, make sure to use RAW format with camera because this format gives more possibilities in the successive stage of photo processing and helps successfully reveal the brightness of the Northern lights without losing the quality of picture.
How to Edit Photos to Make a Big Difference
Ideally, once you have photographed the aurora, the next thing to do is to have the captured images you took refine in an image editor. Various other applications such as Adobe Lightroom, Snapseed or even the default photos application on iPhone have a set of basic photo enhancing tools in the form of sliders or buttons which let you control over the exposure, contrast, saturation, and even the sharpness of the image.
Working through, begin with the exposure and increase this to make the image brighter although the aurora is still detailed. Adjust the balance for the sun in the photos and go for the really cool to wake up the greens and purples among the aurora. Playing with the contrast and saturation of the photo can also bring life and boil in the dinner making the auroras stand out against the backdrop of the black night background.
For those wanting to edit more further, try using the layers in the editing software for the selection of a particular area in the picture making the aurora portion more contrasting without making the background too over exposed.
Client Overnight Photography Tips
Long exposure night photography at such places and times poses some serious risks that must be first considered if one is to achieve magnificent results. Always tell someone a place that you are heading and the time that you should be back. Always ensure that you take a flash light or head lamp since it will be dark and ensure you are accompanied some one.
You should better reconnoiter the country at daylight; then, any obstacles such as animals, rocks, or unpredictable weather changes would be recognizable. Also, make sure your equipment is safely tucked in and that you carry spare batteries for your iPhone; the cold is bound to affect battery life.
Using Tripods and Accessories
Thus, for the best results especially when shooting in low light, it is advised to use a tripod. Using gravity in a longer exposure shoot will bring out images with less blur than a shaky mobile camera which can be eliminated By using the stand for iPhone. If you do not own a tripod on the moment of shooting, you can use any flat surface to place your phone on, or buy a small portable stabilizer.
For the more dedicated night photographer, it may benefit you to expand your smartphone photography equipment with external lenses that supplement your iPhone’s. The larger aperture lenses or by attaching a fish-eye one will allow viewing more of the night sky; filters could also decrease Cold temperature slows down the battery drainage.
To counter this, avoid exposing your iPhone to cold, instead wear some clothes with inside pockets where you can keep it when not in the act of touching it. You can also carry a portable power bank to charge your device in case you are out there in the field. Further, turn off your unnecessary background applications and services, for instance, Bluetooth and location services to avoid expending your battery power. your images.
Common Mistakes to Avoid
When taking photos of the aurora there are a number of issues that can impact on the picture. One common mistake is the wrong shutter speed; for example, shooting at a very high shutter speed when it is bright outside will leave everything too dark. On the other hand, if the shutter remains open for an extended amount of time then the color falls and becomes washed out. This is the area where flexibility is critical: there is always a reasoned and ideal combination for practice in different settings.
The second mistake is the lack of attention to the problem of composition. Just walking around with your camera aimed upwards can result in some extremely unremarkable shots. But do not what more software is better than another and spend sometime to think about your composition. For better and more interesting compositions, always shoot the aurora off set in a rule of thirds and adding foreground objects to the scenes to provide perspectives.
The Science Behind the Northern Lights:
The knowledge of what makes the Northern Lights possible helps to photograph them in a better way. Auroras are an effect of charged particle the solar wind that is a stream of charged particles launched from the sun comes into contact with the Earth’s magnetosphere and its atmosphere. This charged particles react mostly with oxygen and nitrogen to create a source of light.
This depends on the type of gas that is involved, and the altitude at which these interaction takes place. For example, the green lights are usually emitted by oxygen while the red auroras are at higher altitude, that is 150km and above.
The element which can provide purples and blues is nitrogen. Through mastering this science, photographers can not only predict which types of auroras are going to appear, but also be able to determine when and at what intensity solar activities happen, and hence, arrange their work properly.
Essential Gear for Capturing Auroras:
However, the iPhone does well in terms of camera hardware; to amplify your aurora photography some equipment may just be necessary. A well-built tripod is necessary to hold the phone steady during a very long exposure shot, and prevent blur because of shake.
A wide lens attachment for the iPhone also widens a view of the sky when capturing more of the environment, and filters simply minimize the interference caused by light pollution, making the auroras seem more bright and vibrant. Besides, having a power bank with you is always useful because cold also kills batteries quite fast.
It is probably advisable to take the shutter release cable or use the built-in timer on an iPhone don’t shake the camera when taking the shot. Last but not the least; do not underestimate the elegance of warm clothes and blankets, the waiting period while waiting for the perfect shot is much more bearable.
Aurora Photography Adventure Planning
The time of year you choose for the aurora photography expedition is very important for your undertaking. If you want to take some of the best shots, you need to do it during the winter period as the nights are longer, and the skies are darker. It is also needed to know the lunar cycle: When there is a full moon, it bleaches the colors of the aurora, so it will be more effective to arrange the tour for observing the phenomenon for the new moon.
Solar activity also has an important role; by tracking the sun’s outlook, you can learn when you are most likely to see auroras. There are rays and sunspots tracking websites and applications that you can use to determine when to go for your excursions. observe that the auroras are somewhat shy this means that one may have to sit in the cold for several hours before the actual show begins.
It is suggested that taking some feeds and hot drinks with you will assist in maintaining enthusiasm as you wait for nature to perform on stage.
Camera Modes on Your iPhone for Night Photography.
The iPhone camera has many modes which can be useful for the night photography each of them has its advantages. The innovative Night Mode is engaged in such a scenario, where numerous computational algorithms help to achieve crisper pictures with less noise.
For even more control, you might want to have a look at the ProRAW format available on the latest generations of cameras. This format holds more data and enables editing to be effected from the actual capture with much ease. If you are using a third-party camera app, then try to look for touch focus, ISO, shutter speed and white balance controls. Adjusting these settings will make you figure out how to get the best results on capturing the colorful display against the backdrop of darkness.
Also it opens possibility of using portrait mode which makes the contrast with the aurora much more high-contrast and makes images way more interesting.
Creative Techniques
Skills are crucial for making your aurora photographs to be mere shots rather than extraordinary art pieces. One of the effective methods is to use foreground objects in the pictures. It can be trees and mountain backdrops, or better still some dilapidated cabins or chunks of ice in the scene which ground and scale the scene.
A little creativity with the position and point of view can also produce such results; attempt to position the camera at higher or lower altitude or even further or closer to the display to supplement it properly. Photographing under long exposure can give a dream like look if the aurora is active and best yet if it is in motion; Long exposure photography can create ethereal effects, especially if the aurora is active and moving Long exposure photography can create ethereal effects, especially if the aurora is active and moving; Cold temperatures can greatly impact how long your batteries will lastCold temperatures can greatly impact how long your batteries will last.
In an attempt to counter this, wrap your iPhone in a keep warm pouch and put the pouch in an inside pocket next to your body if you are not using the phone. I advise that if you are an outdoor person, you should carry an additional battery charger known as a power bank with you. Also keep unwanted background applications and services deactivated as much as possible and where necessary, include the Bluetooth and location services.
To avoid this, make sure that you warm your iPhone by placing it in an inside pocket laying on your body when not active. If you will be getting lost in the wilderness and moving around a lot you might want to bring a portable charger or power bank with you. Notably, also turn off all the background features, processes and programs, for instance Bluetooth and location services which consume a lot of power.
As well, it can also be useful to look in the water bodies as they reflect the objects and thus can produce reflection with good symmetry. Last but not least, do not be afraid to play with the concepts of light paintings – the use of the flashlight to light close subject matter will make your photographs magical.
Understanding the Aurora Forecast:
One’s ability to read and comprehend aurora forecasts is consequently an important pre-condition for photographing. Several websites and applications include those that will offer real time updates of the solar activity and the aurora forecast. Others include NOAA Space Weather Prediction Center and My Aurora Forecast and AuroraWatch alert that can be gotten from mobile applications.
It is these tools that make it easier for you to identify the most appropriate nights to go out and take photos of the aurora. Another thing that planning could be improved by is an ability to read KP indices, geomagnetic activity measurements; greater KP means more chances of spotting auroras at lower latitudes. Used properly, you’re in the right place at the right time and thus you get to catch the Northern Lights as they are.
Mastering Manual Settings:
If you are to truly maximize your iPhone for night photography then it is only wise that you do it manually more with the settings. Start with exploring the ISO; higher ISO value does allow more light in, but at the same time has some negative aspects, namely noise.:
Begin with an ISO starting from 800-1600 but can be changed depending on the position of the subject. Shutter speed is as equally important; the longer exposure times range from 5 to 30 seconds are good for shooting the details of the aurora but this will need a stable equipment. For these settings, go to the manual mode and test it in real time checking on your images and adjusting whenever necessary. Another major setting is the white balance; finding the right balance enables the preservation of colors of the aurora.
Shooting in RAW format enables one to make more changes while editing since is contains detail of highlights and shadows. If you are to master these manual controls you will considerably improve your night photography.
How to Capture Active Auroras
The most crucial mentoring tip when photographing moving auroras can live up to expectations depending on how one wishes to capture the shots. There is always the need for a slow shutter speed so as to be able to capture movement of the lights. Firstly, let them start with an exposure of 5 to 15 seconds, this depends on the rate at which the aurora moves.
The main thing is to keep iPhone still when the shutter is open to blur the background Remember that Low Light mode is available on iPhone that can be beneficial to catch the motion of the aurora properly.
Another technique you might use to incorporate something dynamic, which represents motion into your images, is panning, where you move the camera a little bit during shooting and this results in a splendid blurred bokeh which shows the movement of lights.
Finally, there is nothing wrong with having some foreground movement; trees swaying, water, can always help to add the sense of movement in your compositions.
Gorgeous Pictures of an Aurora That Has Been Shot Using an iPhone
Since the aurora phenomenon requires special shooting conditions, it is possible to find some useful references in the work of other photographers. Many photographers have recently shared the amazing aurora pictures taken with iPhones which proves these devices’ outstanding performance
. For example, some photographers have highlighted their working with levels auroras with some mountain range in front demonstrating an opposition between a foreground and the light show in the sky.
Some have employed long exposure in their photography to give key prominence on the movement of the auroras by the swirls of light painted in the sky. These examples prove that with proper techniques and proper settings iPhone photographers are able to capture amazing pictures of auroras. These works can be seen in such sites as Instagram or at photography forums, where they announce the settings and technology used; these are useful sources of learning for young photographers.
Sharing Your Aurora Captures:
When you want taking photos of the aurora, you should know that sharing what you’ve captured can be just as thrilling as the actual shooting. Most social media platforms such as Instagram, face book, and twitter are ideal places to display the work being done.
You need to create a focus on your photography and use tags such as #AuroraBorealis, #NorthernLights, and #iPhonePhotography to get noticed and to reach like-minded people. Besides, there are special websites for sharing photos like 500px, Flickr that offer more detailed opportunities for sharing and even criticism so the person can develop his or her skills even more
. In this case, consider writing something like a short story about when you took the pictures to give your viewers some background information to what they’re seeing; this will captivate them. There is also provision for participating in photography competitions and forwards those most special and favourite shots to competent photo galleries as a form of exposing ones talent.
Thus, following these guidelines and techniques, you will be able to become a pro in making photos of aurora borealis with the help of an iPhone and turn you night worships into 될숨 yumotokeepingora of photographic reminiscences.
Conclusion
Shooting the aurora borealis with an iPhone is both technical and an incredible thrill.Photography involves the science behind auroras, choosing the right spots, and using your iPhone features to their potential will help you make excellent pictures of the beauty of nature.
Do not forget to specially correct strategically and Yamiden be careful while embracing the beauty of the starry night. By following these tips and techniques you have good start and good chances to master the art of aurora photography using iPhone. Then grab your jackets, look for the shadow, and get ready to see the phenomenon of Northern Lights with your own eyes!
FAQ: Related How to Capture Aurora on iPhone
1. What is the best time of year to capture the aurora borealis with my iPhone?
Photographing the aurora borealis is best done during the winter season, particularly from September to April when the nights are long and periods of darkness, longer. It is most common between the months of October through February when viewing becomes most opportune when observed from the traditional Arctic Circle states including Alaska in United States, Canada, Norway, and Iceland. Also, it should be done in the night when there is new moon this will help in reducing the amount of light that might disturbs the insects.
2. How can I improve the quality of aurora photos taken with my iPhone?
Not just improving the quality of your aurora photos it involves understanding some rules and using correct techniques and settings.
Make sure that your iPhone is firmly and properly positioned by using a tripod; also understand that your iPhone’s camera does not support any advanced settings such as ISO, Shutter speed and White balance but it is recommend that if you find one, do not use it as it will have a negative impact in your shots. For these controls, use third-party apps because the camera app doesn’t allow much customization of these features As for the composition and foreground objects, it is best to try and improve these aspects as they greatly improve the quality of your photographs.
3. How do I reduce light pollution in my aurora photos?
To minimize light pollution in your aurora photos, therefore, make sure you take your shots from areas that are far away from artificial lights. That is why, the filters that are used for astrophotography can also be used to reduce the influence of light pollution.
Further, the use of low ISO, longer exposure time and reducing light pollution will help to enhance more colors of the aurora.
4. Can I capture the aurora borealis without a tripod?
However, if you lack a tripod it’s possible for one to capture the auroras by finding some object such as rocks, bench or even your backpack to place your iPhone on. The other way that can be adopted is to raise the ISO level so that one can be able to set short exposure time in order to have minimal time for the camera shake. But, the results may not be so sharp as when using a tripod would be.
5. What should I do if my iPhone battery drains quickly in the cold?
It was found out that temperature has an influence on the batteries and it greatly affects batteries that are cold. To avoid this it is advised to a keep iPhone warm by putting it in an inside pocket near the body for instance in the pockets within the coat. A portable power bank may be used in charging your device when out in the field of operation. Also, uninstall those applications you don’t require in background and disable other unnecessary services like Bluetooth and location among others to help in extending its battery life.

